Table of Contents
Are you eager to explore everything that Shared Albums on your iPhone has to offer in terms of collaborative projects? Never be afraid! We will assist you in easily accepting an invitation and knowing how to share an album on your iPhone. Upon finishing this comprehensive guide, you will be able to use your iOS smartphone with ease.
Joining a Shared Album: The Essential Steps
Notification Check:
Whenever you get an invitation to share an album, be sure to check your Notification Center promptly for a personalized notification. With the use of active notifications, make sure you never miss a moment by quickly engaging in shared experiences.
Navigate to Photos:
Use the Photos app on your iOS device to see your photo library. Explore your memories actively as soon as you accept an invitation to share a shared album.
For You Icon:
Locate and tap the “For You” sign located at the bottom of the screen. By doing this, you’re taking the initiative to discover points of agreement and turn your photo collection into a collaborative space.
Shared Album Activity:
Navigate to the “Shared Album Activity” section of the album to locate your invitations. Click the blue “Accept” button for each album if you want to participate in them, even if the notice has been removed. Participating in this procedure will make it easier for you to be included in shared photo narratives.
Album Access:
After you select “Accept,” your membership in the Shared Album Activity section will be verified shortly. Touch the message to have instant access to the shared album. Participating in this phase makes shared memories instantly available, which will strengthen your sense of connection.
Troubleshooting: Shared Album Not Appearing

No Shared Album Activity:
If the Shared Album Activity section isn’t visible, click the “Albums” tab firmly. You are in complete control of how you share photos when you search for shared albums on your own.
Shared Albums Section:
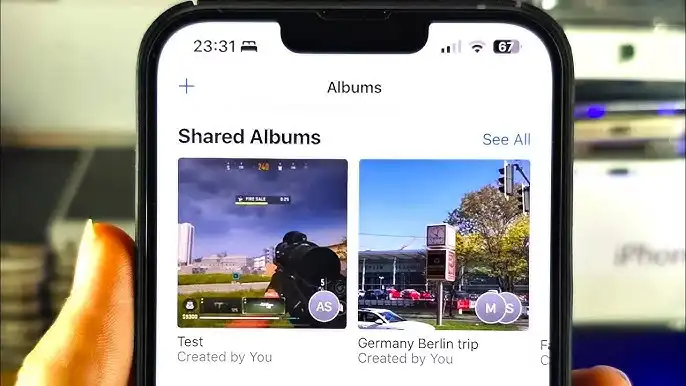
Until you reach the “Shared Albums” area, keep scrolling. Click “See All” to start seeing the albums you’ve added to or curated yourself. You should actively explore the shared albums section if you want to become an expert in the collaborative spaces you frequent.
Ensuring You’re Invitation-Ready
Check Your Settings:
Locate the Settings app, then press down firmly on “Photos.” You are able to change the components that facilitate shared experiences by looking at your choices.
Enable Shared Albums:
This collaboration feature is active when the toggle next to “Shared Albums” is illuminated in green. By making shared albums possible, you are proactively creating the conditions for productive collaboration.
Facing Invitation Woes?
Connection Check:
If you still need to get invitations to shared album iPhone, check the stability of your Wi-Fi and mobile connections. A dependable internet connection is necessary to guarantee a seamless invitation exchange. To ensure that you may participate in shared photo stories without experiencing any disruptions, take care to monitor your connection.
Setting the Stage:
Before you explore the world of Shared Albums, make sure you turn this option on. In the Photos section of Settings, flip the option next to Shared Albums. If you decide to activate this feature, you’ll be ready to take part in photo-sharing experiences with other people.
Going Beyond Acceptance
Once you’ve gotten the hang of accepting invitations to shared album iPhone, think about enhancing your collaborative experience. To enhance your curation of shared memories even more, take into account the following:
Contribute Actively:
Don’t only observe from the sidelines. Add your content to the Shared Album to make it a natural collaborative environment. By actively submitting your work, you can ensure that the shared album experience is varied and rich.
Add Comments:
Sharing comments on events with others makes them more vivid. Words can enhance the shared experience, whether they be true feelings or amusing tales. When you participate in the comments, the shared album takes on a vibrant and fascinating atmosphere.
Organize with Tags:
Using tags to categorize and arrange the memories within the shared album might make it easy to find specific memories. This allows everyone to remember moments that are meaningful to them effortlessly. You may use tags to actively organize your collection of shared photos, making it more arranged and easily accessible.
Conclusion
You are now well-equipped to explore the fantastic realm of shared memories with your iPhone, thanks to your newfound knowledge about accepting Shared Album invites. So knowing how to share an album on an iPhone is important. You must release the power of teamwork if you want to transform your photo albums into enduring experiences that you can share with others. You have only just begun your journey into the world of memories you have both shared and created with other people.
Also Read: Google Home Can’t Send Invites Right Now Error Explained With Best Fixes

