Table of Contents
In portable computing, Chromebooks have carved out a niche for themselves with their simplicity, security, and speed. But did you know that your Chromebook has the potential to run Linux applications as well? This might sound confusing, but worry not! In this beginner-friendly guide, we’ll walk you through the simple steps to unlock the full potential of your Chromebook by installing Linux apps. Whether you’re a student, a professional, or a tech enthusiast, this blog is crafted to enhance your Chromebook experience.
Step 1: Enable Linux on Your Chromebook
Before diving into the world of Linux apps, you must enable Linux on your Chromebook. This process is straightforward:
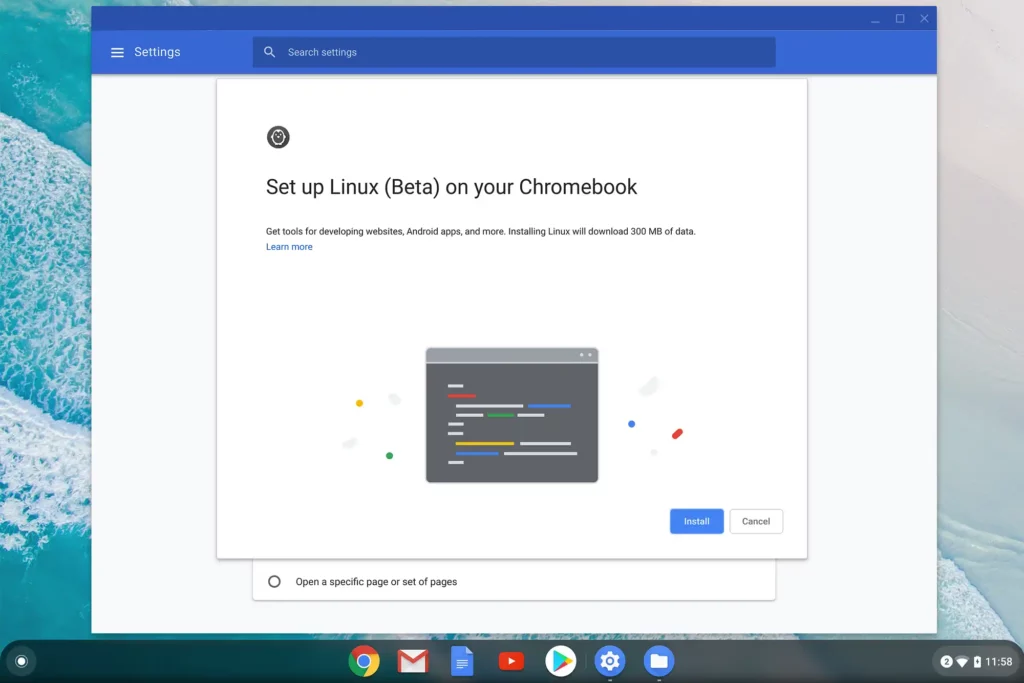
1. Open Settings: Find time in the bottom right corner and then select the gear icon.
2. Turn on Linux (Beta): In the settings menu, look for “Linux (Beta)” or just “Linux.” Click on it and then select “Turn on” or “Install.”
3. Set up Linux: Follow the prompts to set up Linux. This includes allocating disk space and creating a username. Don’t worry about the technicalities; the default settings are fine for beginners.
Pro Tip: Ensure your Chromebook is updated for a smooth setup process.
Step 2: Understanding the Linux Terminal
Once Linux is enabled, you’ll be introduced to the Terminal. It’s a text-based interface that might look a bit different from the graphical user interfaces you’re used to on your Chromebook. Instead of clicking icons and buttons, you input text commands in the Terminal to interact with your computer. Don’t be scared by its appearance; you’ll only need a few basic commands to get started. The Terminal offers simplicity, precise control over your Chromebook, valuable learning opportunities, strong community support, and the potential for automation. As you become familiar with fundamental commands, the Terminal will evolve from an unfamiliar tool into a powerful and versatile asset for your Chromebook tasks.
Step 3: Installing Linux Apps
With Linux set up, you’re ready to install apps. Most Linux apps are installed via the Terminal using the APT package manager. Here’s a simple example to install a popular text editor, Gedit:
1. Open the Terminal: You can find it in your app drawer.
2. Update Software Sources: Type `sudo apt update` and press Enter. This updates the list of available software.
3. Install the App: Type `sudo apt install gedit` and press Enter. Replace “gedit” with the name of any other app you wish to install.
Note: Some apps might require additional steps or different commands, so it’s always good to look up specific instructions for the app you’re installing.
Step 4: Using Graphical Linux Apps
After successfully installing Linux apps, you’ll discover their convenient presence in the drawer, neatly organized under the “Linux apps” section. Launching these apps is easy, requiring just a simple click on their icons. This process copies the familiar procedure of opening any other app on your Chromebook, ensuring a seamless transition from your regular app usage to exploring the world of Linux applications. Whether it’s productivity tools, creative software, or utilities, accessing and utilizing Linux apps is as user-friendly as the rest of your Chromebook experience, adding versatility to your computing tasks.
Step 5: Updating and Removing Linux Apps
Updating: To keep your Linux apps up-to-date, regularly run `sudo apt update` followed by `sudo apt upgrade` in the Terminal.
Removing Apps: If you need to uninstall an app, use the command `sudo apt remove [app-name]`, replacing “[app-name]” with the name of the app you want to remove.
Final Talk:
Congratulations! You’ve expanded your Chromebook’s capabilities by moving into the world of Linux apps. This will enhance your device’s functionality and introduce you to a broader world of open-source software.
Remember, while this guide is a starting point, there’s much more to explore in the Linux ecosystem. So, experiment with different apps, familiarize yourself with the Terminal, and enjoy the journey of learning and discovery.
Also Read: