Table of Contents
Encountering an “IP Configuration Failure” can be a frustrating experience, bringing your internet access to a grinding halt. This issue often presents itself with error messages like “Unidentified Network” or “No Internet Access,” leaving you disconnected from the digital world. But fear not! This comprehensive guide will walk you through the causes and provide clear, actionable steps to fix IP configuration failure on various devices. We’ll explore solutions ranging from simple reboots to more advanced network troubleshooting, ensuring you can get back online swiftly.
What Does IP Configuration Failure Mean?
IP configuration failure occurs when your device cannot secure a valid IP address from your network’s router. The device is unable to communicate on the network or internet due to this missing piece. If you see messages like “failed to obtain IP address” or “WiFi doesn’t have a valid IP configuration,” it’s typically a sign that the network and the device aren’t able to exchange address details properly.
Common signs include:
- No internet access despite a successful WiFi connection
- Error messages: “IP configuration failure,” “saved, but can’t connect,” “failed to obtain IP address”
What Causes IP Configuration Failure?
- Misguided manual settings: Incorrect network or static IP configurations
- Router issues: Firmware bugs, DHCP errors, outdated hardware, or limited DHCP pools
- Device compatibility: Outdated drivers or system software are causing network incompatibility
- Android specifics: MAC filtering or wrong encryption types in router settings are blocking access
What Does “Android IP Configuration Failure” Mean?
On Android, “IP configuration failure” and “failed to obtain IP address” mean your phone couldn’t get an IP from the WiFi router. This leaves the device unable to access the internet until the conflict is resolved.
Common triggers on Android:
- Cache/data inconsistencies
- MAC address filtering on the router
- Router hardware/software glitches
Step-By-Step Solution: How to Fix IP Configuration Failure
Before starting: Verify that the WiFi network is active and that other devices can connect. These steps will resolve the vast majority of “IP configuration failure” errors.
1. Restart Devices and Router
For all devices:
- Power off your router and modem. Unplug both for 20–30 seconds.
- Reconnect and wait for the lights to stabilize.
- Restart your computer, phone, or tablet.
This refreshes the DHCP process and clears minor glitches.
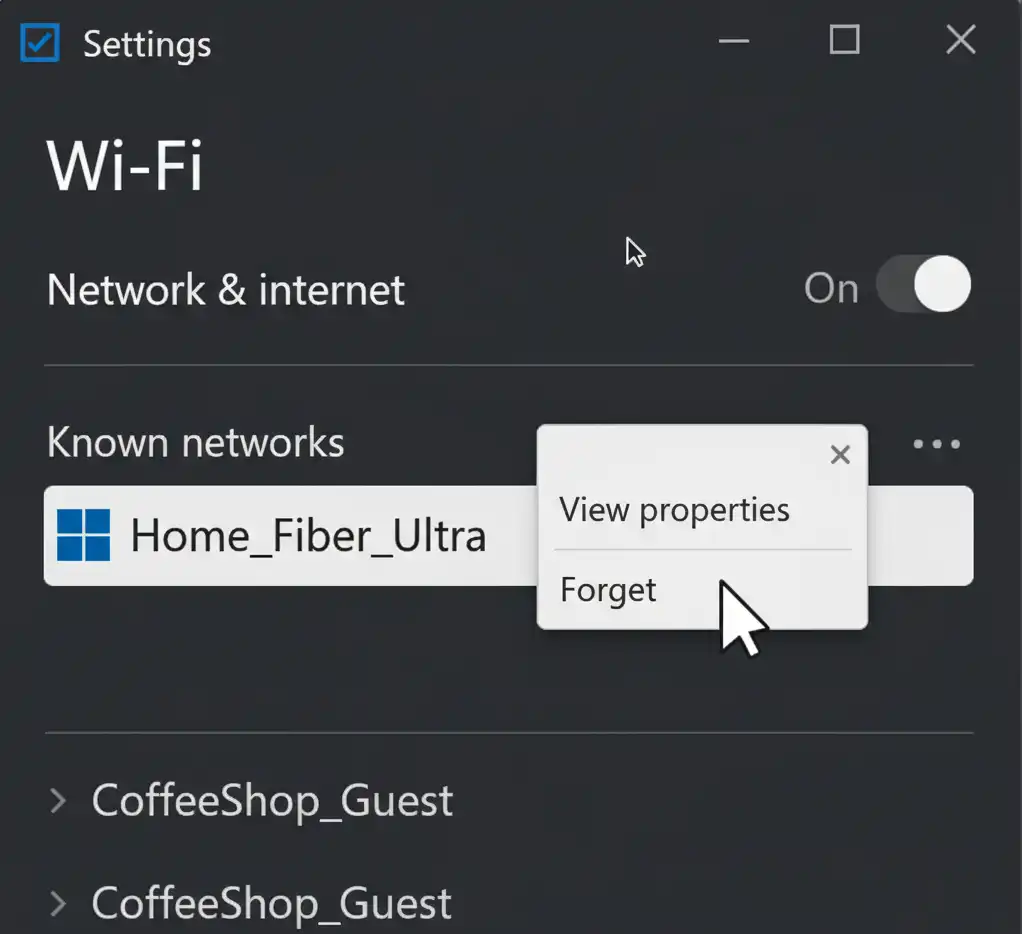
2. Forget and Reconnect to the Wi-Fi Network
Your device might have stored corrupted network credentials or settings. Forgetting the network and reconnecting can force it to obtain new settings.
On Windows:
- Go to Settings > Network & Internet > Wi-Fi.
- Click on “Manage known networks.”
- Select your Wi-Fi network and click “Forget.”
- Then, click on the Wi-Fi icon in the taskbar, find your network, and click “Connect.” Enter your password if prompted.
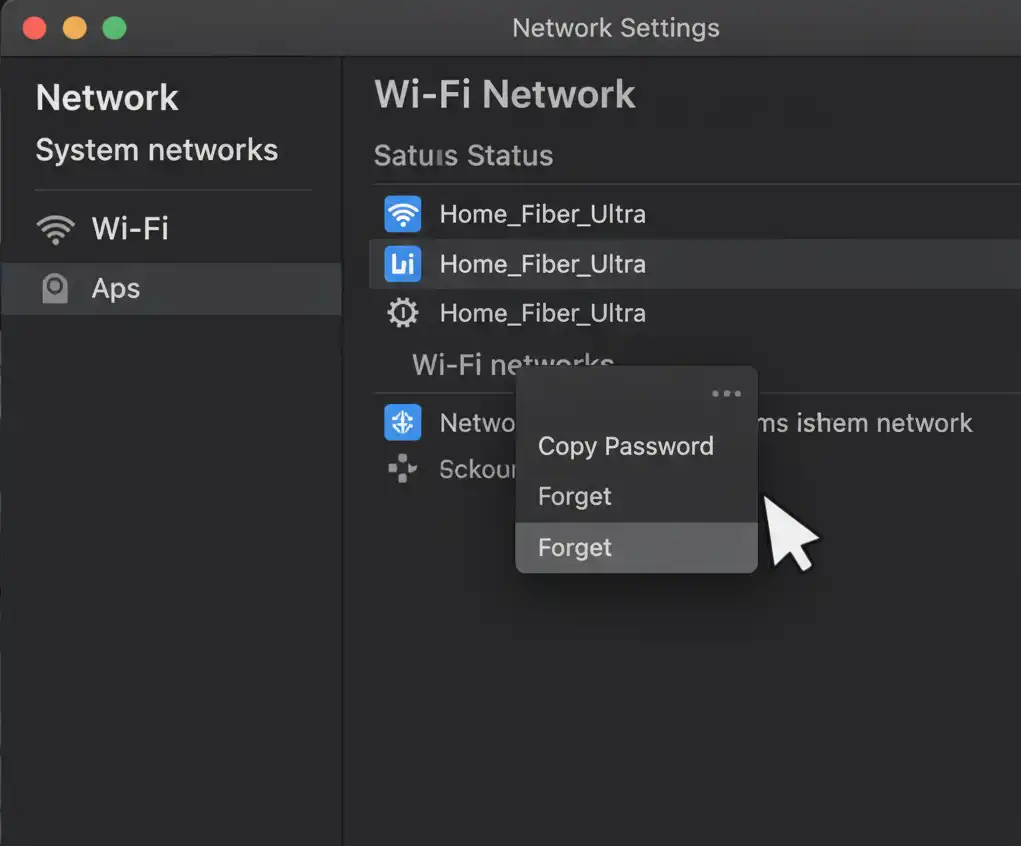
On macOS:
- Go to System Settings > Network.
- Click on “Wi-Fi” in the left sidebar.
- Click on “Advanced…”
- Select your Wi-Fi network from the list and click the minus (-) button to remove it.
- Click “Remove” to confirm.
- Click “OK” and then “Apply.”
- Reconnect to your Wi-Fi network by clicking the Wi-Fi icon in the menu bar.
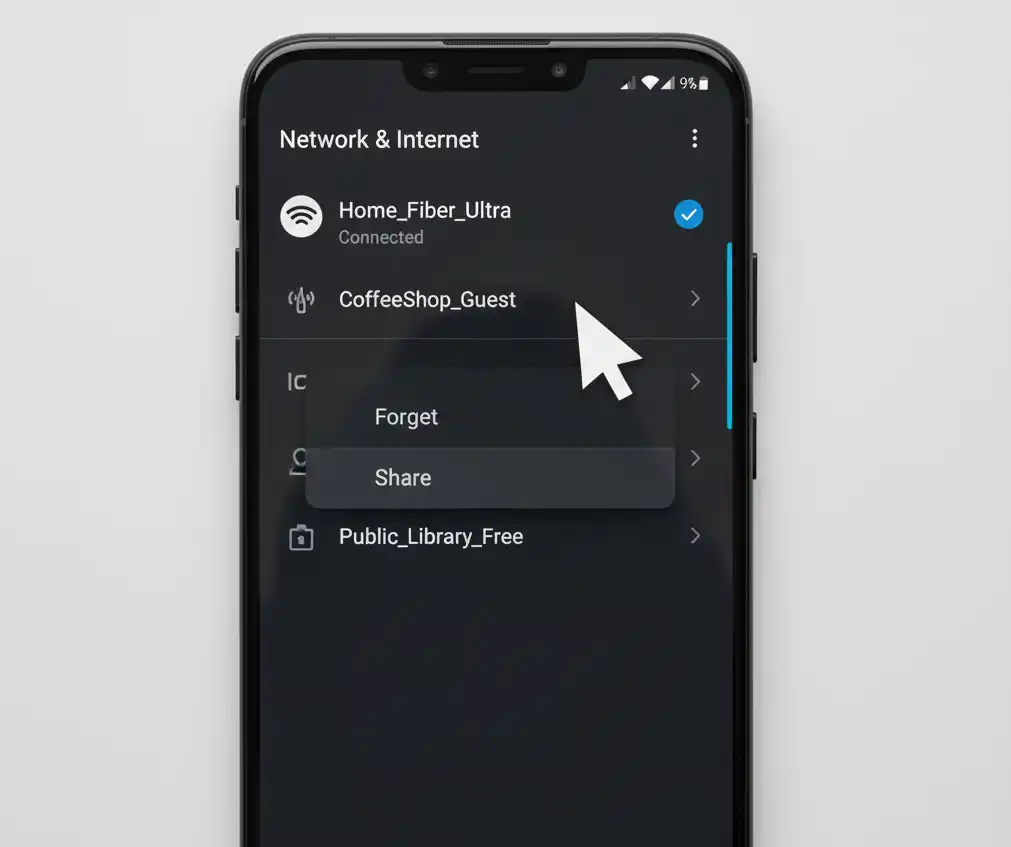
On Android (Android IP configuration failure):
- Go to Settings > Network & Internet> Internet.
- Tap and hold on your Wi-Fi network.
- Tap “Forget” or “Remove network.”
- Then, tap on your Wi-Fi network from the list and enter your password to reconnect.
3. Assign a Static IP Address
Windows
- Go to Settings > Network & Internet > Change adapter options.
- Right-click your WiFi adapter > Properties.
- Double-click Internet Protocol Version 4 (TCP/IPv4).
- Select “Use the following IP address”:
- IP Address: (e.g., 192.168.1.25)
- Subnet Mask: 255.255.255.0
- Default Gateway: 192.168.1.1
- Enter DNS (e.g., 8.8.8.8, 8.8.4.4).
- Click OK and restart.
Android
- Go to Settings > WiFi, long-press your connected network.
- Tap Modify network.
- Enable Advanced options.
- Change IP settings to “Static.”
- Enter IP address, Gateway (router’s IP), and DNS.
- Save settings and reconnect.
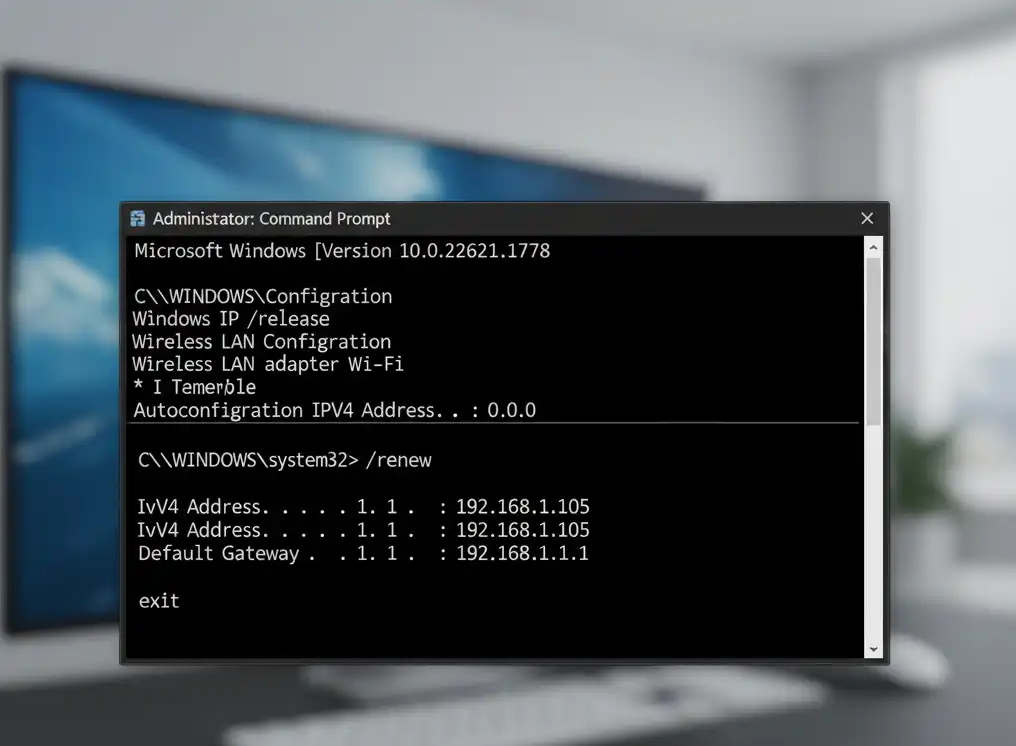
4. Release and Renew IP Address (Windows)
This command-line solution forces your computer to release its current IP address and request a new one from the DHCP server.
Steps:
- Press Windows Key + R, type
cmd, and press Enter to open Command Prompt. - Type
ipconfig /releaseand press Enter. This will release your current IP address. - Type
ipconfig /renewand press Enter. This will request a new IP address. - Type
exitand press Enter to close Command Prompt. - Check your internet connection.
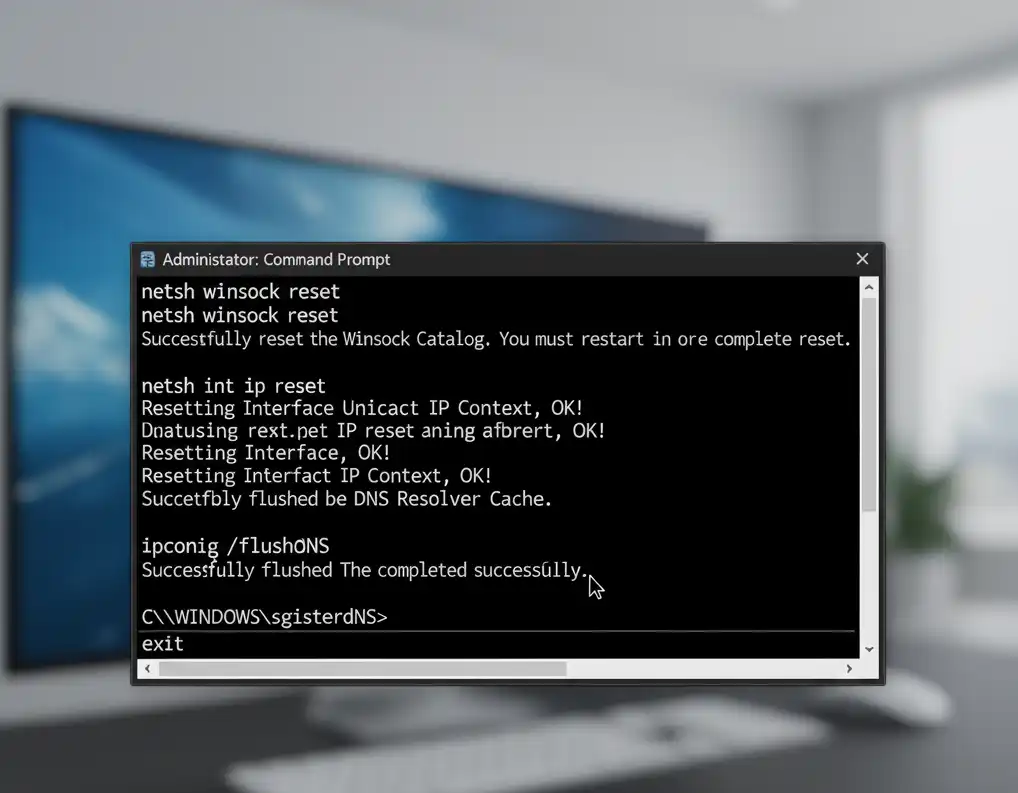
5. Reset TCP/IP Stack and Flush DNS (Windows)
A corrupted TCP/IP stack or DNS cache can also lead to IP configuration failure. Resetting them can clear these issues.
Steps:
- Open Command Prompt as an administrator (Search for “cmd,” right-click, and select “Run as administrator”).
- Type the following commands, pressing Enter after each one:
* netsh winsock reset
* netsh int ip reset
* ipconfig /flushdns
* ipconfig /registerdns
3. Restart your computer.
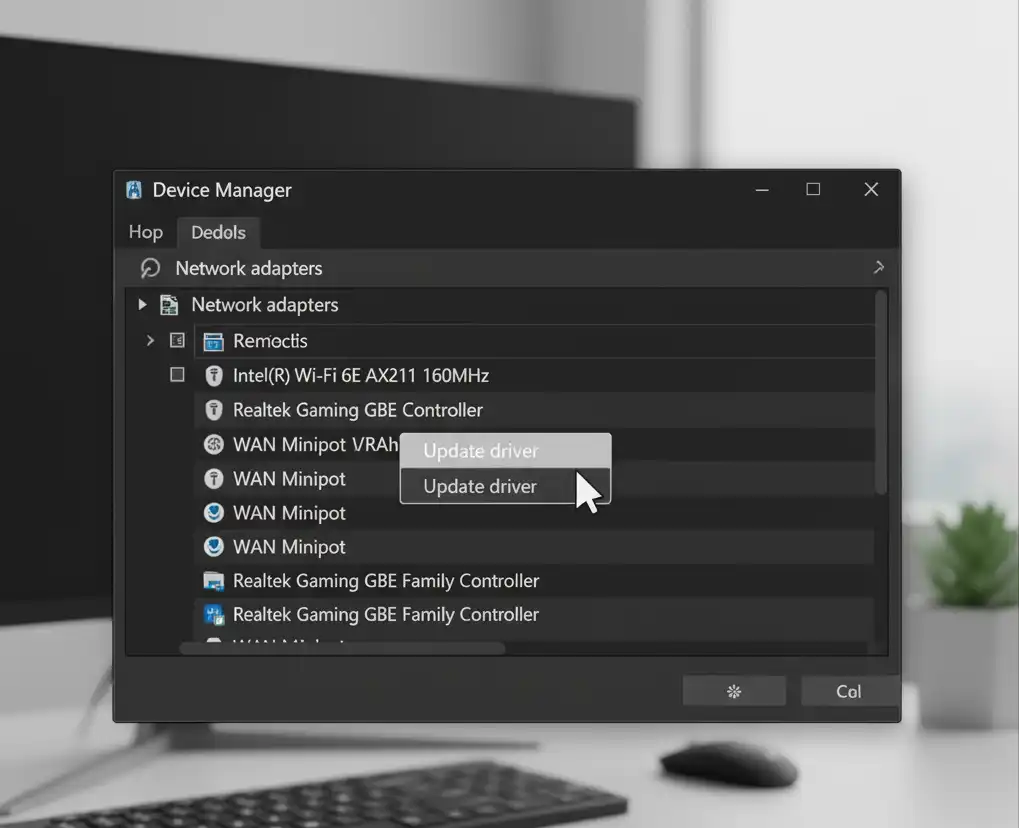
6. Update Network Adapter Drivers and Router Firmware
Outdated or corrupted network drivers are a common culprit for network issues, including IP configuration failure.
Steps (Windows):
- Press Windows Key + X and select “Device Manager.”
- Expand “Network adapters.”
- Right-click on your Wi-Fi or Ethernet adapter and select “Update driver.”
- Choose “Search automatically for drivers.” If Windows doesn’t find a new driver, visit your computer manufacturer’s website or the network adapter manufacturer’s website to download the latest drivers.
- Install the driver and restart your computer.
- Android: Check for system updates in device settings.
- Router: Log in to your router’s web interface. Check for firmware updates in settings.
Outdated firmware can cause address-handout issues.
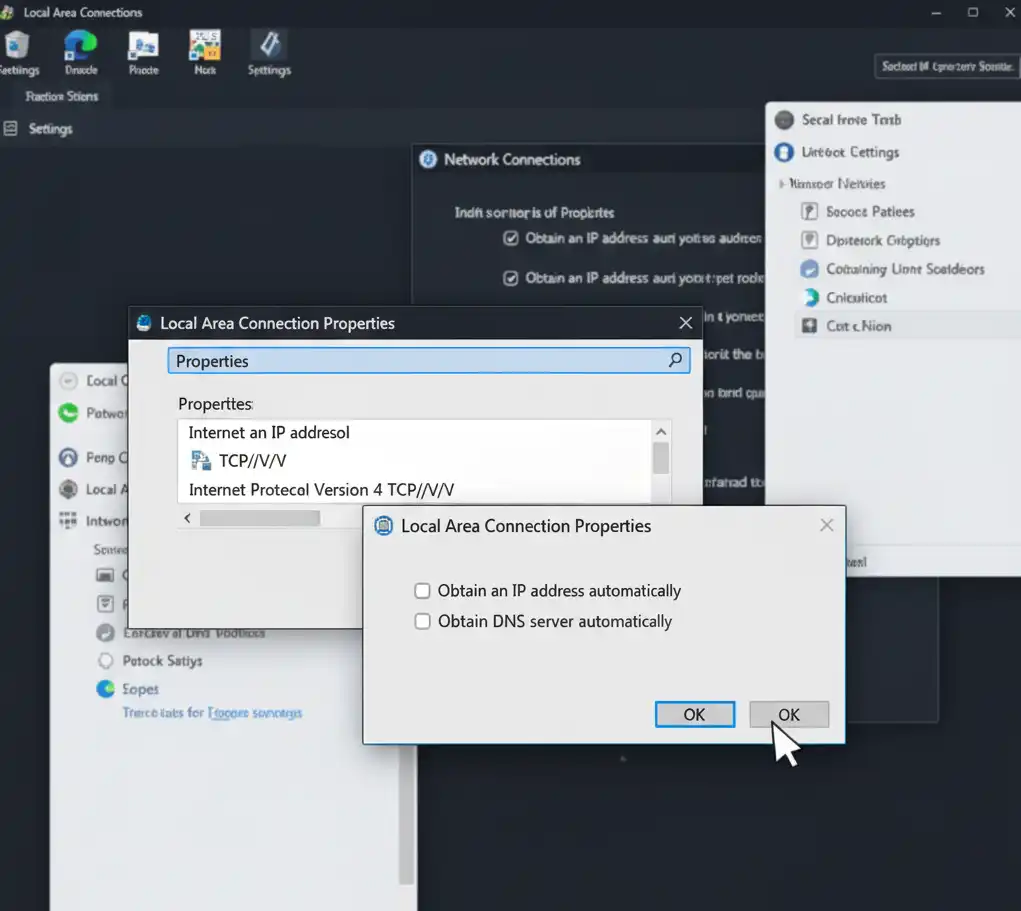
7. Check IP Settings for Automatic Configuration
Ensure your device is set to obtain an IP address automatically (DHCP) rather than using a static IP address, as this can cause conflicts if not configured correctly.
Steps (Windows):
- Press Windows Key + R, type ncpa.cpl, and press Enter. This opens Network Connections.
- Right-click on your active network adapter (Wi-Fi or Ethernet) and select “Properties.”
- Select “Internet Protocol Version 4 (TCP/IPv4)” and click “Properties.”
- Ensure “Obtain an IP address automatically” and “Obtain DNS server address automatically” are selected.
- Click “OK” twice to save changes.
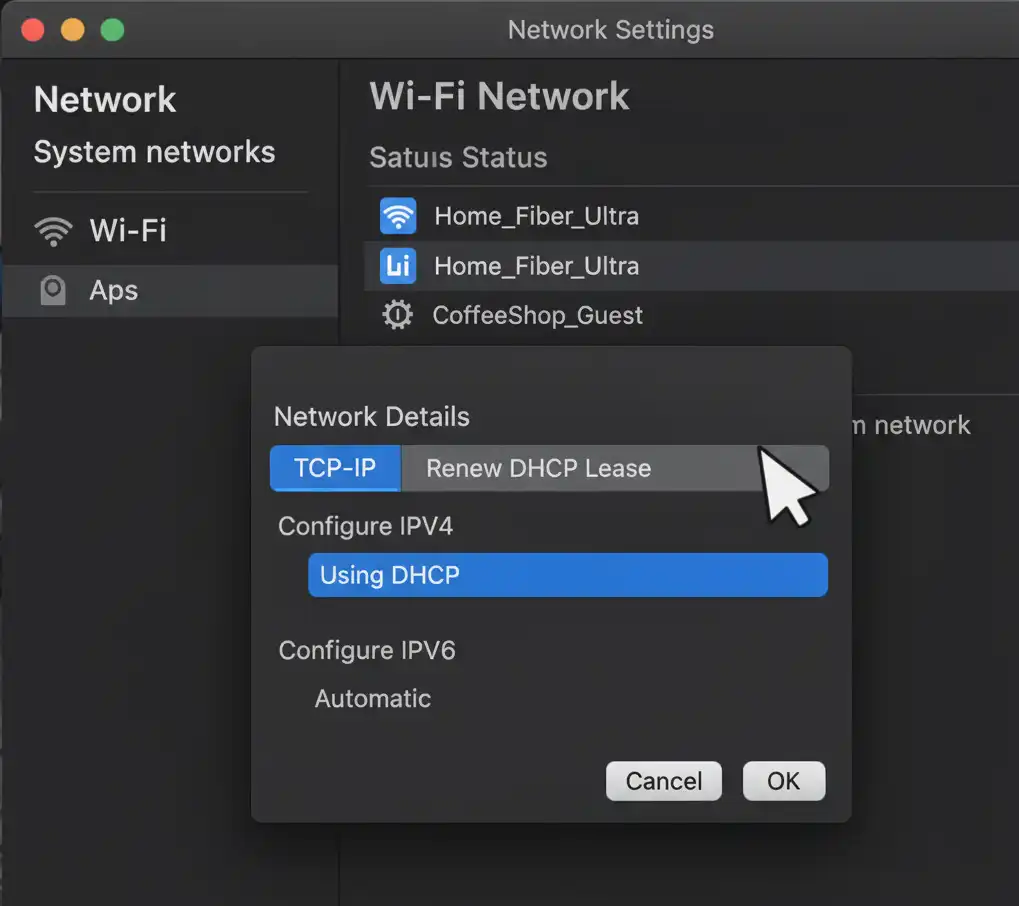
Steps (macOS):
- Go to System Settings > Network.
- Select your active network connection (Wi-Fi or Ethernet).
- Click “Details…”
- Go to the “TCP/IP” tab.
- Ensure “Configure IPv4” is set to “Using DHCP.”
- Click “OK.”
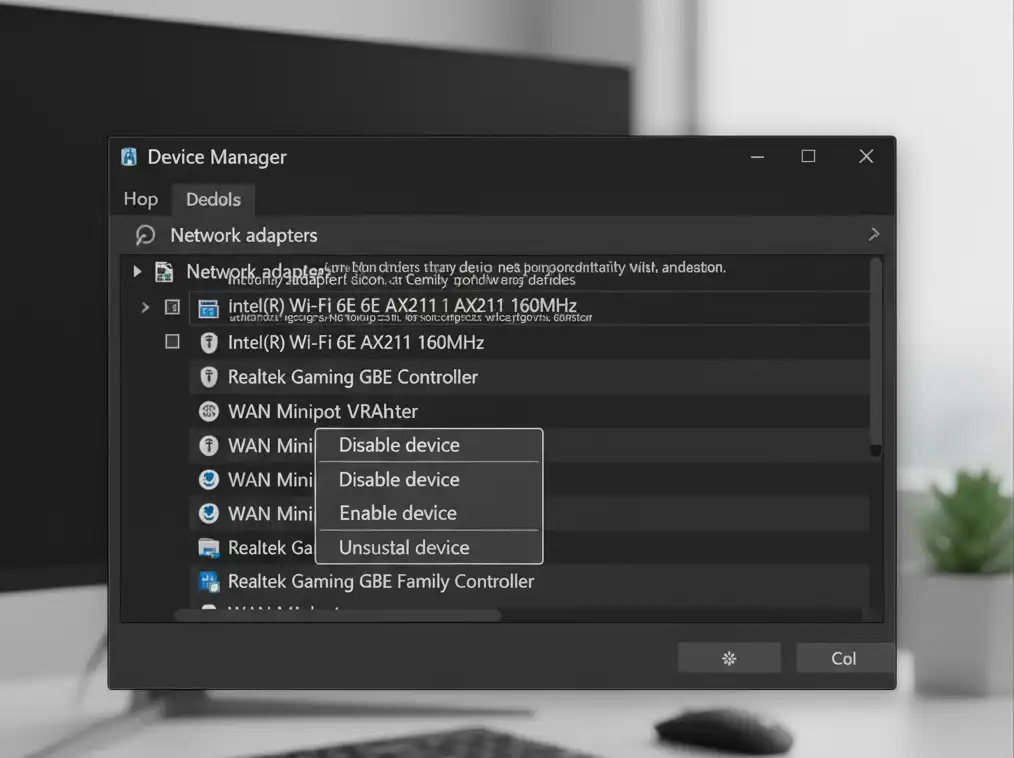
8. Disable and Re-enable Network Adapter
This can sometimes refresh the adapter’s connection to the system and the network.
Steps (Windows):
- Open Device Manager (as shown in Step 6).
- Expand “Network adapters.”
- Right-click on your network adapter and select “Disable device.”
- Wait a few seconds.
- Right-click on the same adapter and select “Enable device.”
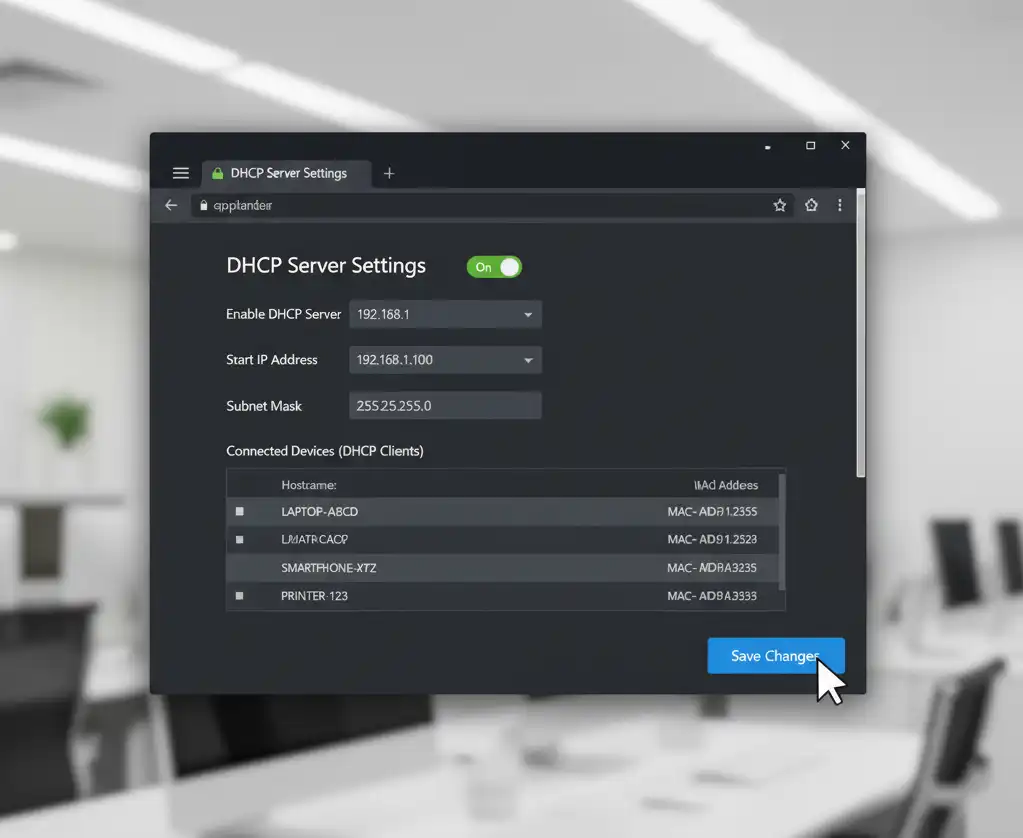
9. Check Router DHCP Settings
If multiple devices are experiencing IP configuration failure, the problem might lie with your router’s DHCP server.
Steps (General, may vary by router):
- Open a web browser and type your router’s IP address (usually 192.168.1.1 or 192.168.0.1) into the address bar and press Enter.
- Log in with your router’s username and password (often found on a sticker on the router).
- Navigate to the “DHCP Settings” or “Network Settings” section.
- Ensure the DHCP server is enabled and the IP address range is correctly configured (e.g., 192.168.1.100 to 192.168.1.254).
- Save any changes and restart your router.
10. Clear App Cache (Android)
- Go to Settings > Apps > Google Play Services.
- Tap Storage > Clear Cache.
- Reboot the phone and retry the WiFi.
11. Change Network Encryption (Android Focus)
- In router settings, change encryption to WPA2-PSK (compatible with most modern devices).
- Avoid outdated TKIP or WEP.
12. Reset Network Settings (Android)
- Settings > System > Reset options > Reset Wi-Fi, mobile & Bluetooth.
- Confirm and reboot. This removes all network profiles (backup passwords first).
13. Additional Troubleshooting and Prevention
- Temporarily disable antivirus or security software to rule out conflicts.
- Use airplane mode on/off if your phone is stuck in a “connecting” loop.
- For large networks, increase DHCP user count in router settings.
Frequently Asked Questions
How often does IP configuration failure happen?
It’s common with new router setups, device updates, or changes in network security. Android devices, in particular, can encounter it after updates or random network changes.
How do I know if the problem is my phone or the router?
Try connecting another device to the same network. If all devices fail, the router or its settings is at fault. If only one device fails, focus troubleshooting there.
Conclusion
Fixing an IP configuration failure is usually straightforward if you follow a structured approach: restart devices, check DHCP settings, configure static IPs, and update both drivers and firmware as needed. Understanding what IP configuration failure means and applying simple steps removes the frustration of network barriers—whether Android IP configuration failure or on your computer.
For long-term stability, keep your networks, drivers, and routers regularly updated, and practice secure WiFi management. The above steps will solve the vast majority of home and small office connection issues.
Also Read: